Z-Tech Head & Neck Restraint Setup Video Instructions Model: Series 1A - SFI 38.1 Certified
For text instructions, with illustrations, click here.
Step 1– Adjust the shoulder width adjustment
Step 2- Adjust the UPPER ARM Angle
Step 3- Adjust the LOWER ARM Length
Upon completion of steps 1-3, once you are 100% happy with the fit of your restraint, we recommend that at this time your remove all screws one at a time (except screw #2 in step 2) and secure them with tread lock “blue” and tighten snug.
Step 4- Adjust tethers and strapping
New video below for the 6A model
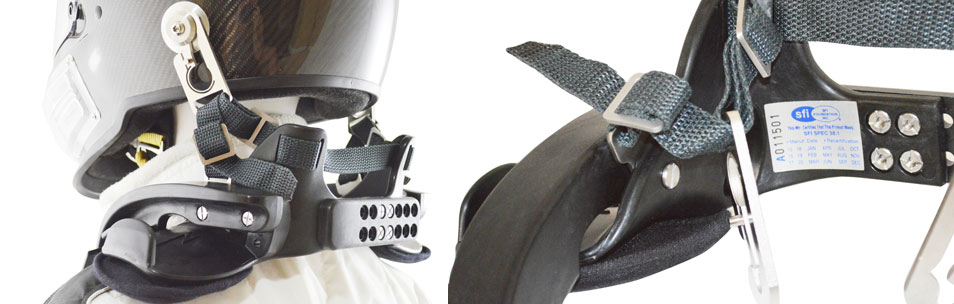
Step 5- Setting Up Helmet
Installation of Z-Tech hardware will depend on if your helmet has a certified M6 Insert or a Predrilled. Helmet inserts that are not certified are not recommended.
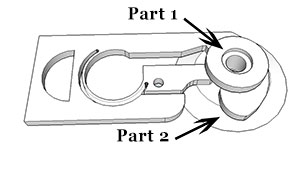
M6 Inserts– Set Part #2 against helmet shell centered to the insert. Then put the M6 Screw provided through Part #1 with thread lock “blue” on the end of the screw. Align Part #1 and M6 Screw through Part #2 and carefully screw the M6 insert into the helmet without cross threading during installation. Tighten snuggly and allow thread lock to dry.
Predrilled– You will first need to install Z-Tech nut washer Part #3 on the interior of the shell. Slide Part #3 between the Shell and EPS/Dense foam upper liner, carefully positioning it center to the predrilled hole. Once Part #3 is positioned correctly, then you can move on. Set Part #2 against helmet shell centered to the insert. Then put the M6 Screw provided through Part #1 with thread lock “blue” on the end of the screw. Align Part #1 and M6 Screw through Part #2 and carefully screw the M6 insert into the helmet without cross threading during installation. Tighten snuggly and allow thread lock to dry.